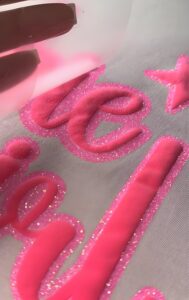
Learn how to print your own plastisol heat transfers using SHALITEINK’s low-cure inks.
This step-by-step guide covers materials, printing techniques, adhesion powder application, gelling, and pressing for pro-level results at home or in your shop.
Heat transfers are a game-changer in many printing scenarios. From neck tags to live event prints to custom jersey names, they offer flexibility and efficiency. While you can always order pre-made transfers, making your own gives you full creative control. Don’t know where to start? This guide will walk you through everything you need to begin printing your own plastisol heat transfers using SHALITEINK products.
WHAT YOU NEED To create your own plastisol heat transfers, gather the following:
- Transfer paper
- Transfer adhesion powder
- SHALITEINK dakwat plastisol
- Skrin
- Squeegees
- Screen printing press
- Conveyor dryer
- Tape
- Heat press
- Plastic container
All these materials are typically available from a local or online screen print supplier. The screen printing ink you choose is critical. Standard-cure plastisol inks need to hit around 320°F to fully cure. Low-cure inks, like SHALITEINK, cure at approximately 260°F, making the transfer process faster and easier. Lower temps mean quicker gelling, less paper warping, and a more streamlined workflow.
THE PRINTING PROCESS Before applying any ink, start by running your transfer paper through the conveyor dryer. Paper naturally absorbs moisture from the air, and damp paper can interfere with ink performance. Drying the paper first helps avoid warping — just be sure not to overheat it. A flat, dry surface is key.
Now for the fun part: printing. Squeegee pressure is critical. Too much pressure pushes ink beyond the stencil edges, too little won’t give proper coverage. Aim for balanced, even pressure to achieve a crisp print. Also, keep your ink deposit reasonably thin — too thick and the heat press will flatten and distort it. Adjust mesh count, emulsion thickness, and squeegee pressure to dial in your best results.
INK TIP: SHALITEINK plastisol inks are highly opaque and bright, so you’ll need fewer passes compared to translucent inks. That’s a huge time-saver when doing multiple prints.
APPLYING ADHESION POWDER Pour a generous amount of transfer adhesion powder into a plastic container. After printing, lay your transfer paper into the container and dust the inked area thoroughly. Flick the paper to remove excess powder, ensuring even coverage without clumping. Return any unused powder to its container for future use.
GEL THE INK Next, you’ll want to gel the ink — not fully cure it. Gelling dries the ink to the touch but leaves it uncured so it can adhere during heat pressing.
Thanks to SHALITEINK‘s low-cure formula, you only need to run the dryer at around 200°F. This makes the process quicker and reduces the risk of damaging your paper. Run each print through until it’s dry to the touch.
APPLYING Plastisol Heat Transfers TO A GARMENT Heat press settings will vary slightly depending on the type of transfer paper and powder, but a good place to start is:
- Temp: 350°F
- Pressure: 4–5 (medium to firm)
- Time: 10 seconds
Place your gelled transfer face-down on the garment, close the heat press, and press.
- Untuk hot peel transfers, peel the paper immediately after pressing.
- Untuk cool peel, wait until it fully cools before removing the paper.
That’s it — you’ve just applied a professional-grade plastisol heat transfer!
Plastisol transfers are perfect for small batch orders, personalized designs, or live event printing. Making them yourself with SHALITEINK Plastisol Heat Transfers products ensures consistency, vivid quality, and a handmade finish that stands out. Now that you know the process, it’s time to bring Plastisol Heat Transfers to life — your way.
